Muv Wheelchair
A wheelchair seat supports daily movement, personal dignity, and physical comfort. It also collects sweat, skin oils, crumbs, dust, and accidental spills. Learning how to clean a wheelchair seat safely requires more than wiping the surface. The correct method depends on the seat fabric, cushion cover, foam, frame, and manufacturer’s care instructions.
Wheelchair researcher and rehabilitation engineer Dr. Rory Cooper has said, “The wheelchair is an extension of the person.” That perspective makes cleaning a safety task, not merely a cosmetic routine. A damp cushion can encourage odors, material damage, and skin problems. Harsh chemicals may weaken upholstery, irritate skin, or affect pressure-relieving materials. Small details matter.
Start with care.
This 2026 guide explains how to clean a wheelchair seat using practical, evidence-informed steps. It covers preparation, surface inspection, spot treatment, disinfecting, drying, and reassembly. A soft brush can remove crumbs from seams. A lightly damp cloth usually works better than excessive water. Never soak a cushion unless its manufacturer specifically permits it. Power wheelchair users should follow shutdown guidance before cleaning nearby controls.
A spotless appearance can mislead. Hidden moisture may remain beneath the cover. I have also found that rushed drying creates avoidable problems, especially in cool rooms. Therefore, the process includes pauses for inspection and honest judgment. If the cover is torn, the foam smells persistently, or the cushion has changed shape, cleaning may not be enough. A qualified seating specialist or healthcare professional should assess it.
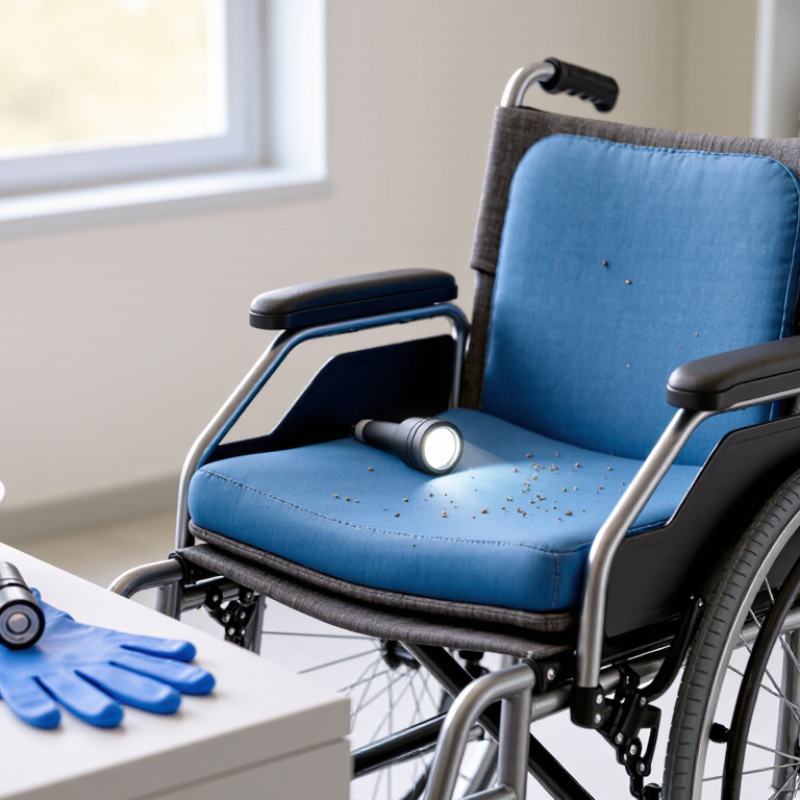
How to Clean a Wheelchair Seat Safely in 2026?
Confirming the seat material is the safest starting point. Vinyl, coated fabric, foam, and breathable mesh react differently to moisture and chemicals. Check the user manual, care label, and manufacturer limits before applying anything. Some covers tolerate mild soap, while others may crack, fade, or lose waterproofing. Do not guess.
The 2022 Global Report on Assistive Technology estimates that more than 2.5 billion people need assistive products worldwide. That scale makes safe maintenance a practical health concern, not a cosmetic task. Remove crumbs with a soft brush, then test diluted detergent on a hidden area. Use a damp cloth, not a soaked one, around seams and foam. The CDC recommends cleaning surfaces before disinfection and following the product’s stated contact time. Never mix chemicals. Ventilate the room.
If disinfection is necessary, confirm that the product is compatible with the seat material and approved for its intended use. Avoid harsh solvents unless the manufacturer specifically permits them. I have seen seats remain visibly clean while trapped moisture caused odor underneath. Dry the cushion completely before use, preferably in moving air away from direct heat. A careful inspection may reveal peeling fabric, exposed foam, or weakened stitching. Stop there and request technical advice. Cleaning is not always repair.
General cleaning compatibility by common wheelchair seat material
Score: 2 = generally compatible for routine cleaning, 1 = use only when the manufacturer permits it, and 0 = generally avoid. Use mild soap and water first, test on an inconspicuous area, avoid soaking cushions, and follow the seat manufacturer’s instructions whenever they differ. Disinfectants, bleach, solvents, heat, and strong chemicals can damage coatings, stitching, foam, or leather.
How to Clean a Wheelchair Seat Safely in 2026?
Start With CDC’s Two-Step Sequence: Clean, Then Disinfect
A wheelchair seat touches clothing, skin, food, and sometimes bodily fluids. CDC guidance separates two actions: cleaning removes soil, while disinfection kills many remaining germs. Never skip the first step. Dirt can shield microorganisms from disinfectants.
Begin by checking the seat material and the manufacturer’s care instructions. Remove cushions when possible. Wear disposable gloves, open a window, and wipe crumbs from seams with a dry cloth. Use warm water and mild detergent. Work from cleaner areas toward visibly soiled spots. Rinse lightly, then dry completely. A damp cushion can develop odor and support microbial growth. That detail is easy to overlook.
Apply an appropriate disinfectant only after cleaning. Follow its label for surface compatibility, wet contact time, and ventilation. The surface must stay visibly wet for the full contact period. Wiping too soon weakens the process. CDC infection-control guidance supports this sequence, while the World Health Organization reports that strong infection-prevention programs may reduce healthcare-associated infections by 35% to 70%. A wheelchair seat is not a hospital bed, but shared equipment still deserves disciplined handling.
Tips: Clean high-touch areas after each user when practical. Focus on armrests, hand rims, joystick controls, and seat edges. Use separate cloths for dirty and clean areas. Do not soak foam. I sometimes rush drying, and that is a mistake. Record the cleaning time in care settings. Inspect seams weekly, because cracks can trap residue.
Select an EPA-registered disinfectant approved for the seat’s material and intended use. EPA registration confirms the product meets stated efficacy requirements when used correctly. Never assume a household cleaner is suitable. Check the label for surface compatibility, required dilution, and wet contact time. This is the period the surface must remain visibly wet. The CDC’s Guideline for Disinfection and Sterilization identifies concentration and exposure time as critical factors in disinfectant performance.
Remove the cushion when possible. Shake away loose debris, then clean visible soil with detergent and water. Dirt can reduce disinfectant performance. Apply the product evenly, including seams, handles, and the underside edge. Keep the surface wet for the full labeled time, often one to ten minutes, depending on the product. Use a timer. I once wiped a seat dry too quickly and had to repeat the process; speed is not proof of safety. Do not mix chemicals, and improve ventilation while cleaning. The EPA’s product-label guidance is the controlling reference, not a generic online chart.
Afterward, let the seat dry completely before use. Check for cracking, fading, or sticky residue. Fabric, vinyl, and foam may react differently. Follow the wheelchair manufacturer’s care instructions when they conflict with general cleaning advice. A 2023 healthcare environmental-cleaning review also emphasized consistent contact time and complete surface coverage, yet real-world cleaning remains uneven. Recheck high-touch areas after each transfer.
How to Clean a Wheelchair Seat Safely in 2026?
Use 70% Alcohol Only When the Seat Manufacturer Approves It
Begin by checking the seat label, care manual, and approved disinfectant list. Do not assume that 70% alcohol suits every cushion or cover. Some materials may crack, fade, stiffen, or lose their protective coating. The CDC’s Guideline for Disinfection and Sterilization reports that alcohol solutions between 60% and 90% can destroy many bacteria, fungi, and viruses. However, alcohol does not reliably kill bacterial spores. It also evaporates quickly, so the surface must remain wet for the stated contact time.
Remove visible dirt with mild detergent and water first. Use a soft cloth, not a rough brush. If the manufacturer approves 70% alcohol, apply it to the cloth rather than flooding the seat. Wipe the seat evenly, including edges that collect skin oils. Keep liquid away from seams, foam openings, sensors, and metal hinges. Allow complete air drying.
Small details matter. Ventilate the room. Keep alcohol away from flames. Wear gloves if your skin is sensitive. WHO cleaning guidance also stresses following product instructions and allowing proper wet contact time. I once treated “more disinfectant” as safer. That was poor judgment. Excess liquid can damage upholstery and create hidden moisture. When approval is unclear, stop and ask the supplier or a qualified rehabilitation professional.
How to Clean a Wheelchair Seat Safely in 2026?
Cleaning a wheelchair seat safely begins with checking its care instructions. Remove the cushion if the design allows it. Shake away loose debris outdoors or over a washable surface. Use warm water, mild detergent, and a clean, soft cloth. Avoid soaking foam, because trapped moisture can damage internal materials. Wipe high-contact areas, including the front edge, side supports, and belt contact points. Rinse the cloth often. A dirty cloth can spread contamination.
Drying requires more attention than wiping. Press clean towels against the surface without twisting the fabric. Place the seat in a well-ventilated area, away from direct high heat. Check underneath, inside folds, and around fasteners. The surface may feel dry while the seams remain damp. Do not reuse the seat until it feels dry at every point. Be patient here. I sometimes underestimate hidden moisture after a quick inspection. That mistake can lead to odors, weakened stitching, or microbial growth.
Inspect each seam before reinstalling the seat. Look for loose threads, split fabric, cracked foam, damaged zippers, or bent attachment hardware. Record the cleaning date, method, detergent used, drying time, and any visible damage. Add a clear photo when possible. A second person can verify the inspection, especially in care settings. If staining, damage, or odor remains, pause reuse and request qualified assessment. Test the cushion’s stability and attachments before the user sits down.
| Step | Cleaning Dimension | Recommended Action | Materials or Conditions | Safety Check | Record Before Reuse | Result |
|---|---|---|---|---|---|---|
| 1 | Prepare the wheelchair | Move the wheelchair to a well-ventilated, washable work area. Engage the wheel locks and remove detachable cushions, covers, trays, and personal items. | Clean work surface, disposable gloves when needed, and a separate container for soiled items. | Confirm that the wheelchair is stable and cannot roll during cleaning. | Record the date, time, and wheelchair identification number or location code. | Required |
| 2 | Check the seat material | Read the care label or equipment instructions before applying liquid, detergent, or disinfectant. Identify whether the seat is fabric, coated upholstery, vinyl, mesh, or foam. | Use only products compatible with the seat material. Do not assume that a disinfectant safe for hard surfaces is safe for upholstery or foam. | Stop if the care instructions are missing and the material cannot be identified safely. | Record the seat material and any product restrictions. | Do Not Proceed if Unknown |
| 3 | Remove loose soil | Brush or vacuum away crumbs, dust, hair, and other dry debris before wet cleaning. Work from the cleanest area toward the dirtiest area. | Clean brush or vacuum attachment. Avoid aggressive brushing that can damage stitching or protective coatings. | Do not shake contaminated items in occupied or poorly ventilated areas. | Note visible soil, spills, body-fluid contamination, or embedded debris. | Ready for Wet Cleaning |
| 4 | Wash the seat surface | Apply a small amount of compatible detergent solution to a cloth or sponge and wipe the seat systematically. Use clean water on a separate cloth if residue must be removed. | Use lukewarm water unless the care instructions specify otherwise. Avoid soaking foam or forcing liquid through seams. | Do not mix detergents, disinfectants, bleach, ammonia, or other chemicals. | Record the cleaning product category and dilution used, if applicable. | Clean Surface |
| 5 | Disinfect when indicated | When infection-control procedures require disinfection, use a compatible product and keep the surface visibly wet for the contact time stated on the product label. | Follow the label for concentration, contact time, ventilation, rinsing, and personal protective equipment. | Never shorten the labeled contact time. Do not use a product that can damage the seat or create unsafe residue. | Record the product type, dilution or ready-to-use status, application time, and required contact time. | Label-Compliant |
| 6 | Dry completely | Wipe away excess moisture and allow the seat, seams, underside, and cushion interior to dry fully before reassembly or use. | Use airflow and a clean, dry area. Do not use high heat unless specifically approved for the material. | The seat must feel dry, with no dampness, trapped moisture, odor, or cool wet areas along seams. | Record the drying completion time and the person who verified dryness. | Do Not Reuse While Damp |
| 7 | Inspect seams and structure | Inspect stitching, piping, zippers, fasteners, hook-and-loop areas, cushion covers, mounting points, and the underside of the seat. | Use good lighting. Look for fraying, open seams, cracks, peeling, deformation, mold-like growth, retained soil, or exposed foam. | Remove from service if damage could affect skin protection, positioning, stability, or pressure distribution. | Record defects and attach photographs when permitted by privacy procedures. | Hold if Damaged |
| 8 | Reassemble and verify fit | Reinstall the cushion and cover according to the equipment instructions. Confirm that the cushion is oriented correctly and sits securely. | Check straps, fasteners, brackets, and alignment. Do not modify the cushion or frame to make it fit. | Confirm that no cleaning cloth, loose item, chemical residue, or sharp edge remains beneath the seat. | Record the final fit check and the name or initials of the verifier. | Securely Installed |
| 9 | Document release for reuse | Complete the cleaning record before the wheelchair is returned to service. Include any unresolved damage or follow-up action. | Use a paper or electronic log protected according to applicable privacy requirements. | Release only when the surface is clean, fully dry, structurally acceptable, and free of unsafe residue. | Record date, time, cleaner, inspection result, disinfectant contact time when used, defects, corrective action, and release decision. | Approved for Reuse |
Confirm whether the seat uses vinyl, coated fabric, foam, or breathable mesh. Check the care label and user manual. Do not guess.
Remove the cushion if the design permits it. Shake away crumbs outdoors or over a washable surface. Use a soft brush for remaining debris.
Use warm water, mild detergent, and a clean, soft cloth. Test diluted detergent on a hidden area first. Rinse the cloth often.
Avoid soaking foam or flooding seams. Use a damp cloth instead. Trapped moisture may cause odors, weakened stitching, or internal damage.
Clean the front edge, side supports, fasteners, and belt contact points. These areas receive frequent contact. Dirty cloths can spread contamination.
Disinfect only when necessary. Confirm material compatibility and follow the product’s stated contact time. Never mix chemicals. Ventilate the room.
Press clean towels against the surface without twisting it. Place the seat in moving air, away from direct heat. Check folds and undersides.Wait longer.
Check every surface, seam, fold, and fastener. The seat must feel completely dry. Inspect for peeling fabric, exposed foam, loose threads, or cracked areas.
Record the date, cleaning method, detergent, drying time, and visible damage. Add a clear photo when possible. Documentation can reveal repeated problems.
Pause reuse and request qualified technical assessment. Do not treat damaged material as merely dirty. A quick check can fool me. Test stability and attachments before use.
Learning how to clean a wheelchair seat safely begins with identifying the seat’s material and reviewing the manufacturer’s care instructions. Some fabrics, vinyls, and coated surfaces can be damaged by strong chemicals, excessive moisture, or heat. Before cleaning, remove loose debris and test any product on a small, hidden area. Follow a two-step process: first clean the surface with an appropriate detergent and water to remove dirt, oils, and residue; then apply a properly registered disinfectant that is compatible with the seat material. Always follow the product’s required wet contact time rather than wiping it away too quickly.
Use 70% alcohol only if the seat manufacturer specifically allows it, as alcohol may weaken finishes or cause discoloration. After treatment, allow the seat to dry completely in a well-ventilated area. Inspect seams, stitching, cushions, and attachment points for trapped moisture or damage before reuse. For shared equipment, record the cleaning date, products used, and inspection results to support consistent hygiene and safe operation.
